Thursday, February 10, 2011

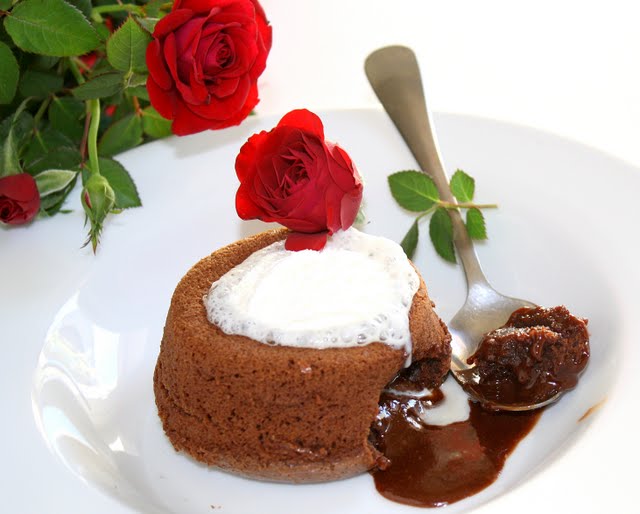
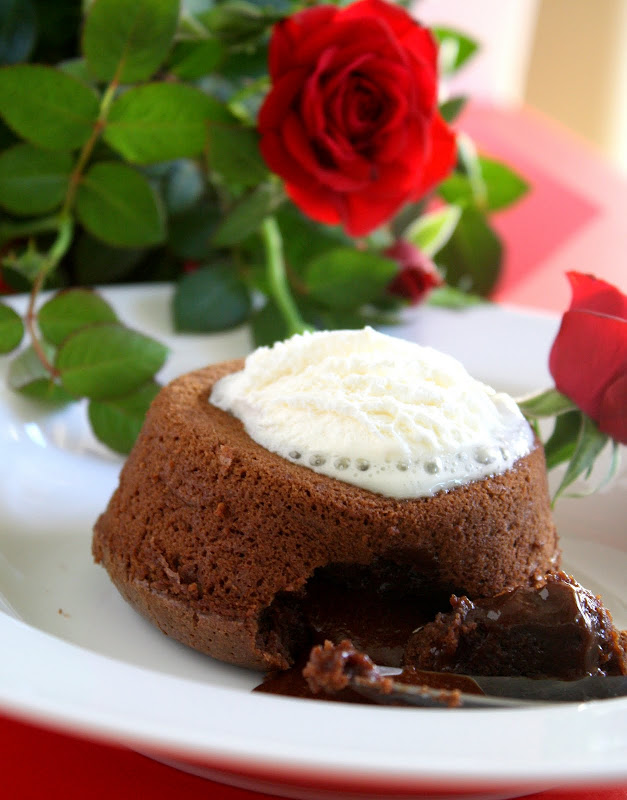
Molten Chocolate Lava Cake

Molten Chocolate Lava Cake

Today, I finally got some time to catch up on blogs and the first two posts I happened to check were Tanvi's Saffron Rice Pilaf with Chicken Balls and Kulsum's Molten Chococlate Lava Cake.
Both recipes were like love at first sight. It was exactly when I was thinking about what to make for the Valentine's day that I found these two recipes.

We generally tend to eat out on special occasions like Valentine's day. But this year I decided to make some good food at home. With busy schedules, eating out has become a norm these days, so special occasions call for good home made food.

So after looking at the above mentioned recipes from Tanvi and Kulsum, Valentine's day menu was decided.
Saffron rice with chicken balls, I was confident that I can not go wrong, but the molten chocolate cake I wanted to try it out before Valentine's day. I don't take any risk with baking. Usually when I experiment any recipe from other blogs, I end up modifying it according to our tastes and available ingredients. But, when it comes to baking I follow the instructions to the dot.  I do not have lot of experience with baking and the few times I experimented, I failed miserably.

I followed the recipe exactly, and since I was just testing it I used half the quantities mentioned in the original recipe. I reduced the amount of sugar as the chocolate already had some sugar in it.


Valentine's DayValentine's Day


Ingredients:

Dark Chocolate: 130 gms( I used Ghirardelli 70% extra bitter sweet bar)
Butter: 5 1/2 tbsp
Powdered Sugar: 1 cup
Warm water: 1/2 cup
Instant coffee: 2 tsp
All purpose flour: 2/3 cup
Eggs: 2
Egg yolks: 2
pinch of salt

Procedure:
Mix the instant coffee powder in warm water and set it aside.
Melt the chocolate and butter in a microwave.
Now add the powdered sugar , mix  and let it cool.
Whip the eggs, yolks and the coffee. Then add the flour and the salt.

Butter the ramekins and preheat the oven too 400 F. place the ramekins in the top rack of the oven and bake for 12-13 minutes. Remove the ramekin from the oven run a knife around the edge and invert it on the serving plate. Serve with ice cream or whipped cream.

Note: The bake time might differ based on the size of the ramekins. The first one I baked for 12 minutes and got the runny chocolate inside, but when I tried the second one, I ended up baking it for 14 minutes and the inside got baked. It was semi solid.

If you want to make the batter ahead, prepare it and refrigerate. Before baking, heat the batter in the microwave for not more than 30 secs or you can leave it out until it comes to the room temperature.

Wish you all a very Happy Valentine's Day

Valentine's Day
Read more »

Friday, January 21, 2011

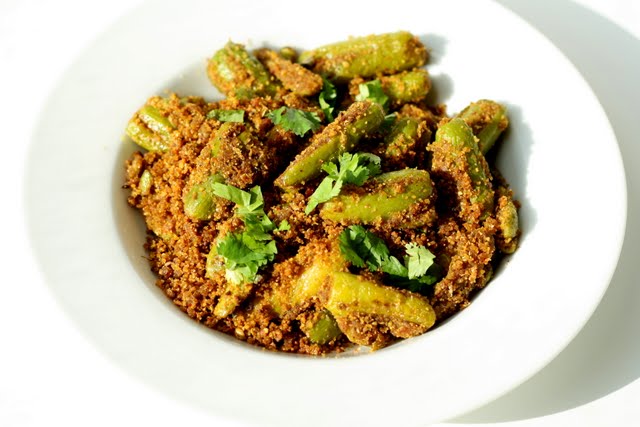
Stuffed Dondakaya/Tindora Curry

Stuffed Dondakaya
Here I come after a long break from blogging. Okay, this time the break is not because I was not cooking, but because I was not finding time to take pictures, edit and upload them.

Finally today I got some free time to post this recipe for Stuffed Tindora curry. This recipe is originally from my mom and it has been altered a bit by my sister.

The original recipe had just the channa dal, cumin seeds, garlic and red chillies for stuffing. Coconut and poppy seeds were my sister's additions.

Ingredients:

Tindora/Dondakaya: 20-25(Chop ends and make slits length wise for stuffing)

For Stuffing:

Channa Dal: 4 tbsp
Cumin Seeds: 1 tsp
Coriander seeds: 2 tsp
Poppy seeds: 1 tbsp
Dried Red Chillies: 3
Garlic: 2 cloves
Dry Coconut: 1 tbsp
Curry leaves:5
Salt to taste

Tempering:
Oil: 2 tbsp
Mustard Seeds: 1 stp
Cumin seeds: 1 tsp
Turmeric: 1/2 tsp
Curry leaves: 4
Hing: a pinch

Procedure:

Boil tindora with water and salt in a pressure cooker until you get 1 whistle or boil them in salt water until half cooked.

Take a pan and when the pan is slightly heated add the channa dal and slightly roast.
Now add the remiaining ingredients under the stuffing and slightly roast them.

Grind them into powder in a spice grinder. Add salt to the powder.

Now stuff this powder into the tindora slits and set them aside.

Now add oil to a pan and add the tempering ingredients in the order mentioned and when the seeds start spluttering, add the stuffed tindaora to the oil and sprinkle any stuffing powder that is left on top. Mix gently and sprinkle 2 tbsps of water and cover the lid and cook for few minutes.

Remove the lid and fry for few more minutes.

Garnish with Cilantro.Serve with hot steamed rice.
Read more »

Thursday, January 6, 2011

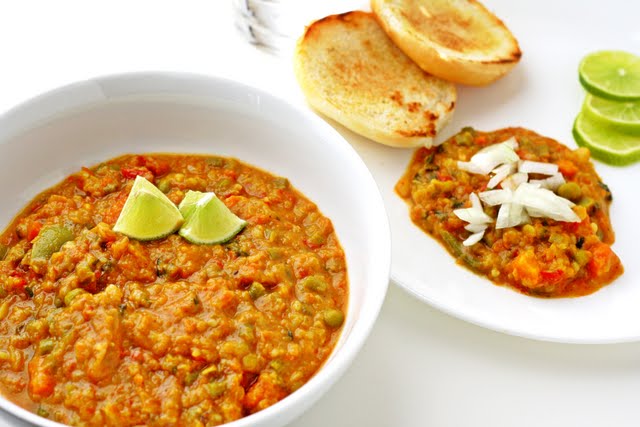
Pav Bhaji

Pav Bhaji
Pav Bhaji is a popular street food in India. Pav means bun and bhaji is curry made with different vegetables.  The bhaji is a blend of different vegetables in an onion and tomato based gravy spiced with the aromatic pav bhaji masala.
It is easy to prepare and is nutritious too as it consists of number of vegetables. It is traditionally made with butter and is topped with butter before serving. To make it healthy I cook with oil and just top with little butter before serving. Sometimes I avoid that too.

Ingredients:

Potatoes(cut in cubes): 1 large
Peas: 1/2 cup
Carrots(chopped): 2
Beans(cut in pieces): 1/2 cup
Bell Pepper(cut in small pieces): 1
Onions: 1 large
Tomatoes: 2 medium-sized
Oil: 2 tbsp
Dried fenugreek leaves(Kasuri Methi): 1 tbsp
Pav Bhaji masala: 2 tbsp(available in Indian grocery stores)
Turmeric Powder: 1 tsp
Red Chilli Powder: 1 tsp
Lime Juice: 1 tsp
Green chillies(cut in small pieces): 2
Buns

Procedure:

Boil the potatoes, carrots and beans in a pressure cooker and set them aside.
Add oil to a pan and when the oil is heated add the onions, turmeric powder and  green chillies,sprinkle some salt over the onions and cook them until they become soft.
Now add the ginger garlic paste and cook for 2-3 minutes. Add the bell pepper and saute for 2-3 minutes.
Add the chopped tomatoes and cover the pan with a lid and cook for few minutes until the tomatoes become very soft. Add 1/2 cup of water to the tomatoes of required.
When the tomatoes are completely cooked, add the dried fenugreek leaves and the pav bhaji masala and mix well. Remove the carrots, beans and potatoes from the pressure cooker and save the water.
Now add the pressure cooked potatoes, carrots, beans to the onion tomato mixture and mash them with a potato masher.
Add the frozen green peas and mix them gently. Add  the pressure cooker water to the pan and cook for 10 minutes. Add the red chilli powder. Add the lime juice and mix. Adjust the salt.
Garnish with chopped cilantro. Serve with slightly toasted buns.
Toast the buns on a pan with little butter or oil.
Add chopped onions over the bhaji before serving.

Note: If using fresh green peas add the to the pan after the onions are cooked and before adding the tomatoes. They take little more time to cook then the frozen peas.
Tip: Curry can be made in excess and can be refrigerated for 3-4 days.
If you do not have pav bhaji masala, a tsp of cumin powder, a tsp of coriander powder and 1/2 tsp of garam masala can be used instead.
Read more »

Monday, January 3, 2011

Mango Pie

Mango Pie

I know it has been a while that I posted a recipe on FoodZone. These days I haven't cooked much, and even if I cooked, those recipes were already there on the blog. I wanted to post some special recipe for Christmas but couldn't and then thought of doing that for new year and that did not happen either. Holidays have been busy with friends, parties and travelling around.

Hope you all had a merry Christmas and a very Happy New Year.

My cousin 'S' sent me this Mango pie recipe and pictures to put on my blog on the last day of the last year :) I wanted to add it to the blog immediately as a new year post, but I just could not find time to do that. I did not even know where my laptop was. The day was that crazy. In fact today morning, before going to work, I literally had to search for my laptop. Sometimes I wish we had something like Google to search for things in the house.

Anyways coming to the recipe, she said it is a simple but a super yummy pie. So if your still i n the holiday mood and want to treat yourself with some more goodies, go ahead and try this pie. All it needs is some ready made ingredients and few minutes to put them together.

Mango Pie


Ingredients:
 1 can Mango Pulp(available in Indian stores)
Kraft Cool Whip : 8 oz
Unflavored gelatin: 2 packets
Graham Cracker Pie Crusts: 3
Walnuts for garnish.

Procedure:


Boil 1 cup water and add gelatin to it. Mix it untill the gelatin dissolves in water. Now mix mango pulp, cool whip and dissolved gelatin in a bowl and pour it in 3 pie crusts. Garnish with walnuts. Let it set in the refrigerator for atleast 4 hours.
Read more »

Wednesday, December 8, 2010

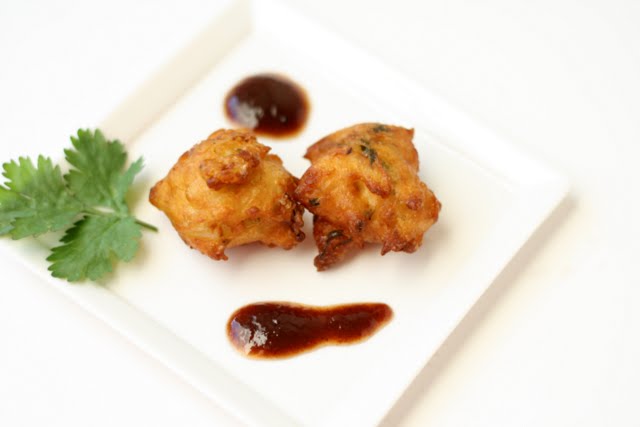
Mysore Bonda

Mysore Bonda


Mysore is the name of a city in India and Bonda is a deep fried flour dumpling. I have no clue why this is called Mysore bonda. May be the recipe originated in Mysore and got that name.

This is a perfect snack for the chilly evenings. All purpose flour is mixed with sour yogurt and the dumplings are deep fried in oil. Mysore bonda is a popular street food in South India - often sold along with Mirchi Bajjis(green peppers dipped in chickpea flour and deep fried in oil) in portable stalls on the street corners.


Mysore Bonda


Mysore Bonda


Ingredients:

All purpose flour: 2 cups
Sour yogurt: 1 cup
Onions, finely chopped: 1/2 cup(optional)
Cilantro, finely chopped: 2 tbsp
Ginger, grated: 1 tsp
Salt to taste
Cumin seeds: 1 tsp
Green chillies, finely chopped: 1
Curry leaves: 5
Water: 1/4 cup
Baking soda: a pinch

Procedure:

Add the all purpose flour in a mixing bowl and add the cumin seeds, cilantro, salt, green chillies, onions and ginger and set it aside.
Take 1 cup of yogurt in a bowl and a quarter cup of water and whisk thoroughly.
Add the whisked yogurt to the AP flour mixing it without forming any lumps.
Add a pinch of baking soda and set the batter aside for an hour.
Add oil to the frying pan and when the oil is heated scoop out the batter with an ice cream scoop or with the hand and drop the dumplings in the oil.
Cook until the dumplings turn golden brown , remove them with a slotted spoon and drain the excess oil on a paper towel.

Tip: Make sure the oil is not over heated when you drop the dumplings. the dumplings change color very soon on the outside and inside will not be cooked well.
Read more »

Monday, November 29, 2010

Cranberry Rice

Cranberry Rice

Hope you all had a very good Thanksgiving. We had a very relaxing Thanksgiving this year. Most of the time we make travel plans during thanksgiving. But, this year we decided to stay home and relax.
Moreover we got back from a trip to a beautiful resort just last week and did not want to travel again.
We had a potluck at a friend's place and I made the curry leaf chicken and this cranberry rice. Sometimes it feels so good just to sit back and relax.
So, do you have any cranberries left from the cranberry sauce you made for Thanksgiving? If so, you can try your hands at this simple cranberry rice. This is a colorful and vibrant looking rice. The pink cranberries and the yellow turmeric blend together to give this beautiful color to rice. This is similar to the South Indian lemon rice, I used cranberries instead of lemon. Even the taste is kind of similar to the lemon rice.

Ingredients:

  • Long grain white rice(Cooked): 2 cups
  • Fresh cranberries: 1/2 cup
  • Chopped onions: 1/2 cup
  • Salt to taste
  • Green chillies: 3
  • Oil: 1 tbsp
  • Cilantro(finely chopped): 2 tbsp
  • Grated ginger root: 1/2 tsp
Tempering:

  • Oil: 2 tbsp
  • Urad Dal: 1 tsp
  • Mustard Seeds: 1 tsp
  • Curry leaves: 4-5
  • Dried Broken Red Chillies: 2
  • Cumin seeds: 1 tsp
  • Turmeric powder: 1/2 tsp
  • Asafetida: a pinch


Procedure:

  1.  Make a paste of fresh cranberries and green chillies and set it aside.
  2. Add oil to a pan and when the oil is heated, add the chopped onions and fry for 2-3 minutes. Now add the grated ginger and the cranberry paste and cook for 5-6 minutes.
  3. Add the cooked rice to a mixing bowl and apply the cranberry paste to the rice mixing gently. Add salt.
  4. Now take a small pan and add the oil and turn on the stove. When the oil is heated, add the tempering ingredients one after the other in the order mentioned and when the seeds start spluttering, turn off the stove and add it to the rice in the mixing bowl.
  5. Mix the rice gently and do a taste test to check the salt. Adjust the salt and garnish with cilantro.
Note: Change the number of green chillies according to your spice level. You can even omit the green chillies. You do get little spiciness form the red chillies in the tempering.
Read more »

Thursday, November 18, 2010

Red Beer - Hubby's recipe

Red Beer

Do you like beer? I hate beer. If you are a person like me who doesn't like drinking beer then this is for you. In this house 'P' is a beer person and I am the wine person. Yes, I don't like beer and he doesn't like wine. Red beer is something we both like and we occasionally make this. Bloody mary mix is combined with beer along with hot sauce, salt and pepper making it taste more like spicy tomato juice than beer.
'P' is not very fond of cooking. I am the one who cooks and he is the one who cleans(....once in a while).
The only time he enters the kitchen to make something from scratch is to make this "Red Beer"(Oh...he can make Maggi - instant noodles btw! :-)...)
Even to make this simple cocktail, he shouts some hundred times asking me where is this and where is that :)
But, I must truly admit that I totally love this Red Beer. Not sure if it is his own recipe or he got it from somewhere, he claims it's his secret recipe though.

So, here is the recipe.

Combine equal quantities of bloody mary mix and beer, add few drops of hot sauce and half a tea spoon of lime juice. Sprinkle a pinch of salt and pepper on top and mix gently.

Note: You can change the beer to bloody mary mix ratio as you like. I prefer 1/4 cup beer and 3/4 cup bloody mary mix.
If you do not want to use alcohol, you can substitute beer with sparkling water.
Read more »

Member of